
How AI photo verification works
How optional photo analysis supports a parent or admin’s review of a member submission.
AI photo analysis is optional. This guide follows a member or child submitting a photo task for parent or admin review. Scores and feedback are guidance and can be wrong; review the actual work before deciding. Admins’ own submissions can follow a different completion path.
Step 1
Turn on AI analysis when you create the task
In Create Task, choose whether to require a photo and enable optional AI Photo Analysis. Turning on AI Photo Analysis also turns on Require Photo, and the form shows how many analyses your household has left this month. Allow Photo Library Uploads lets members choose an existing image; otherwise they must take a photo with the camera.
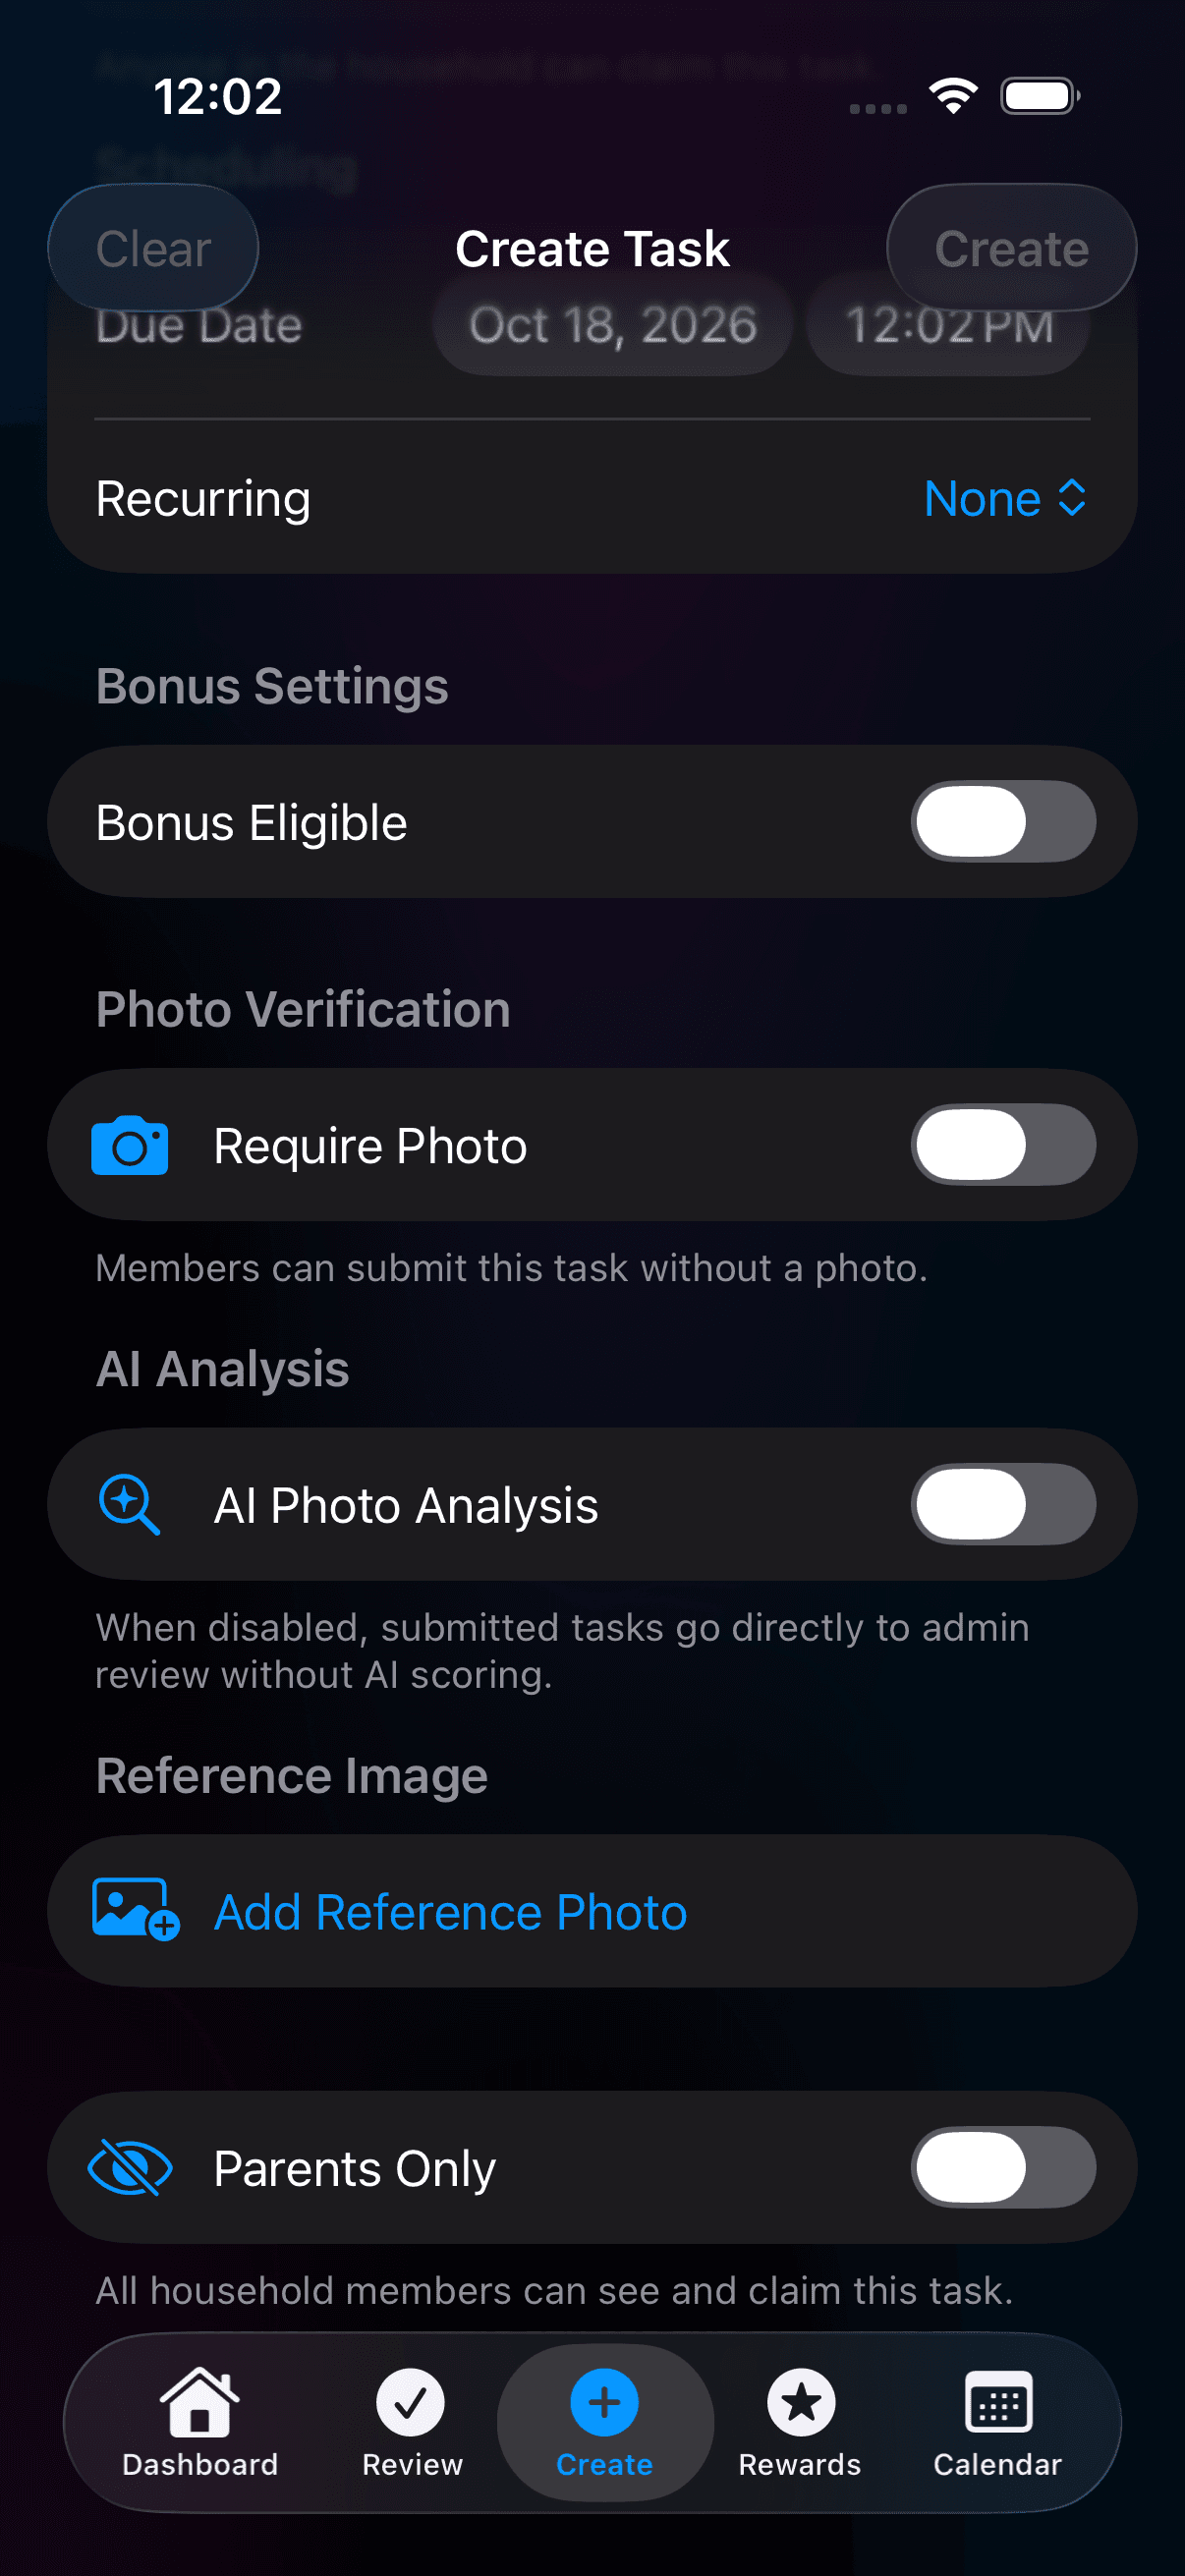
Choose whether the task needs photo evidence or optional AI analysis. Open screenshot at full size (opens in a new tab)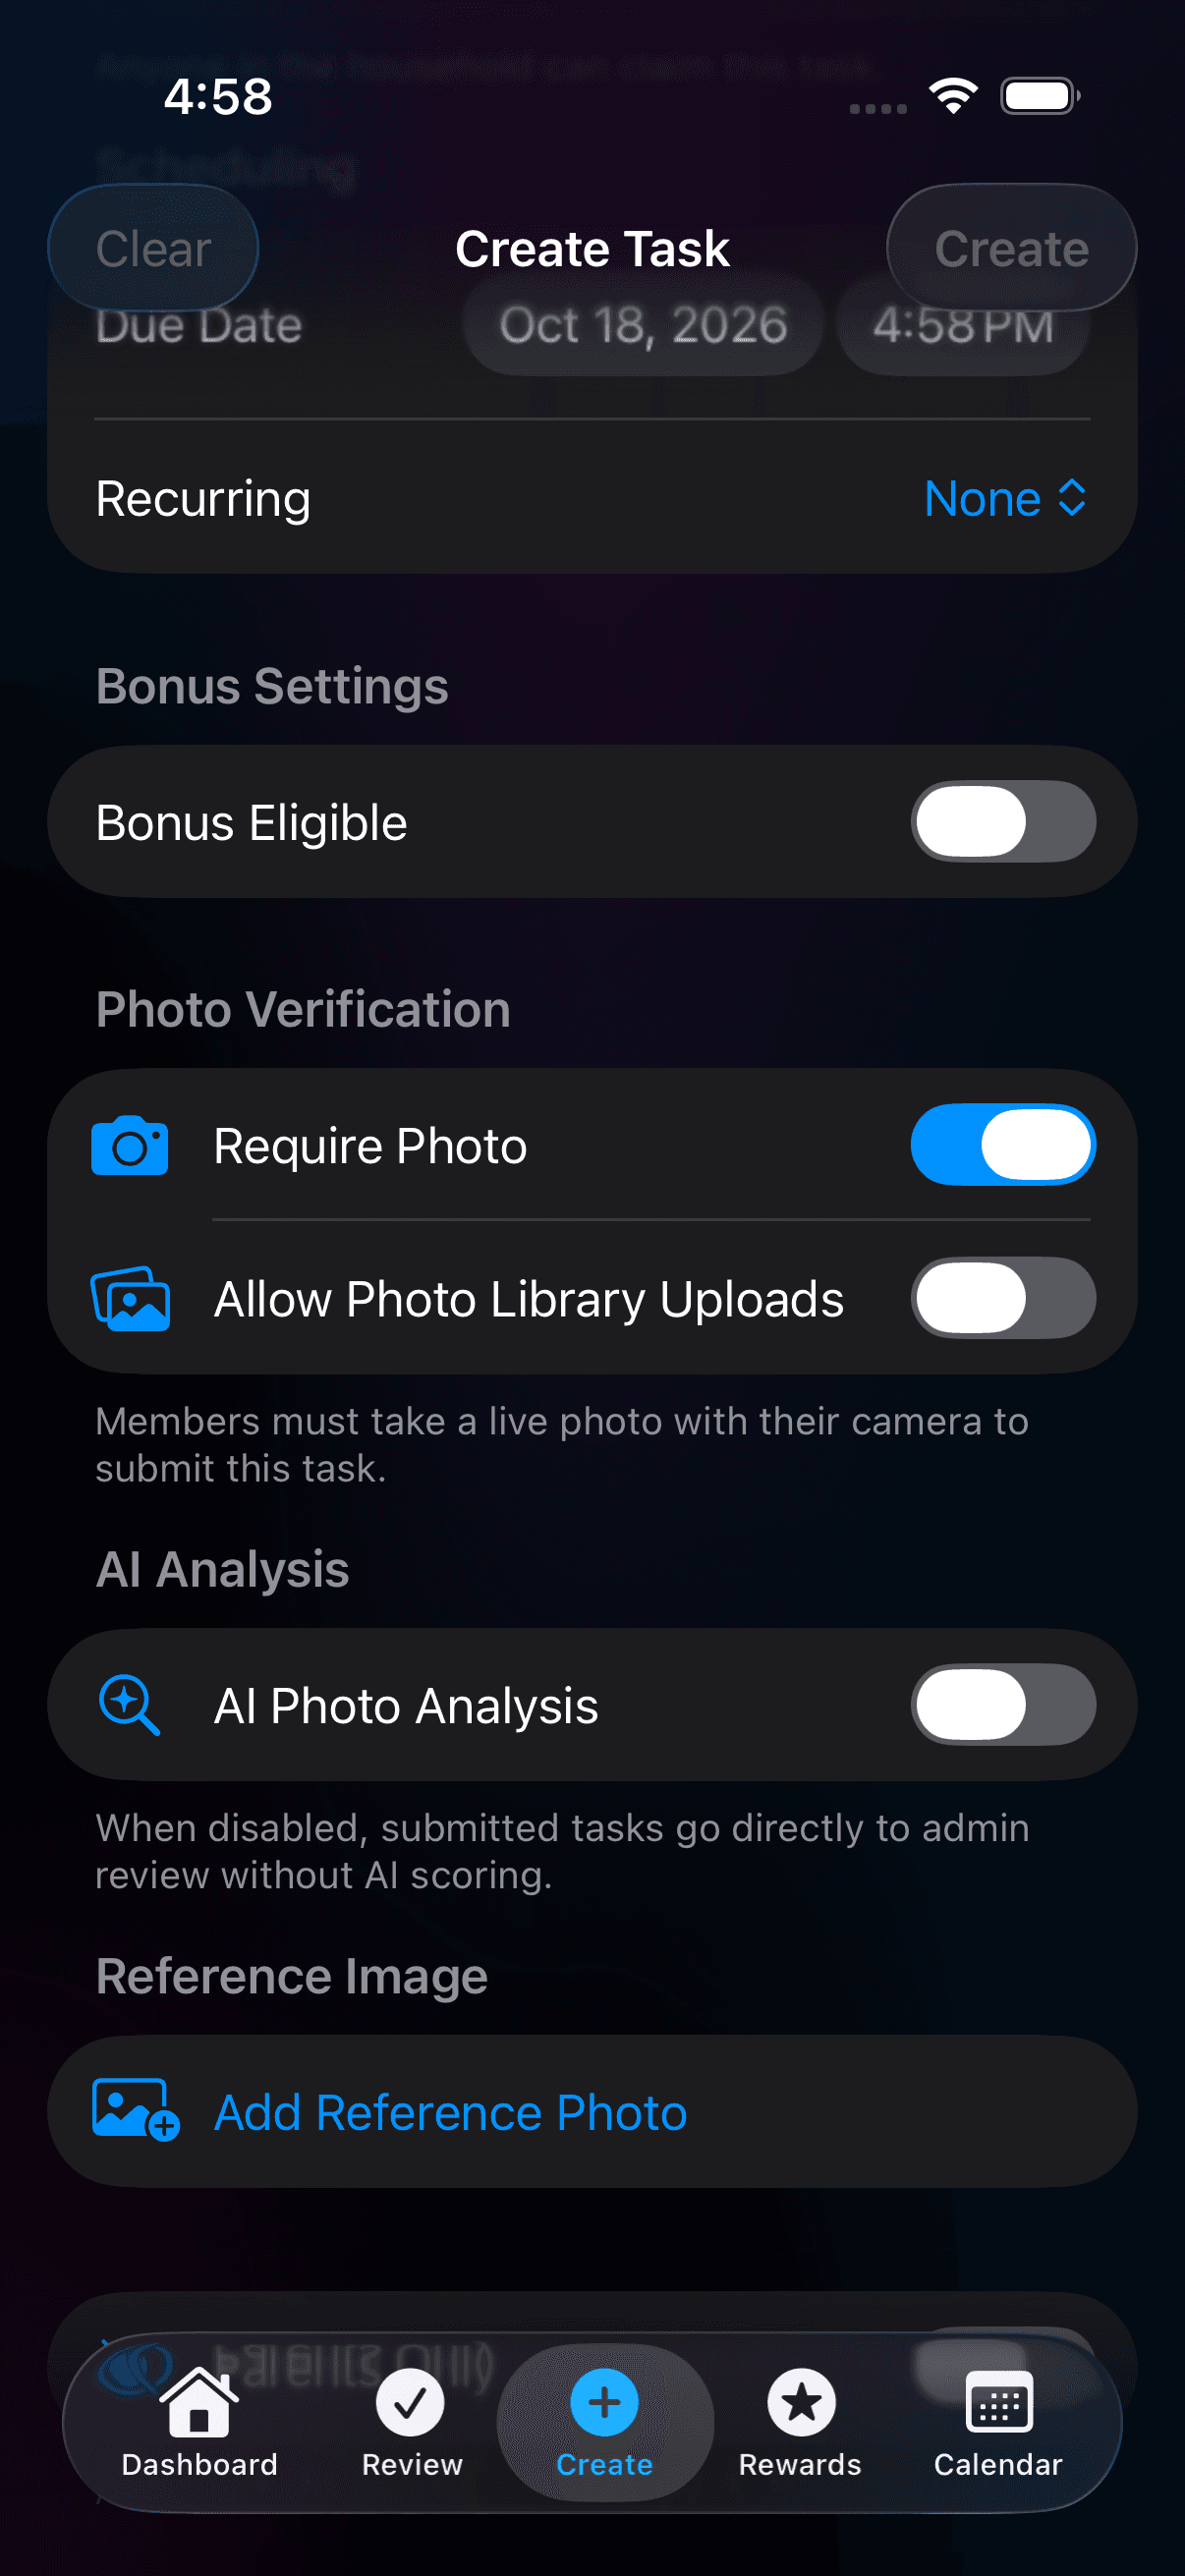
Photo evidence can be required without turning on AI analysis. Open screenshot at full size (opens in a new tab)Step 2
Submit photo evidence when the work is done
Open the task from My Tasks and tap Start Task when you begin. After finishing the work, tap Submit Task. If a photo is required, the Submit Task screen shows Add Photo Evidence and keeps the submit button disabled until a photo is attached.
Step 3Member
Choose a photo source
Tap Add Photo Evidence to open Photo Capture. Take Photo opens the camera. Choose from Library is available only if the admin enabled library uploads for this task; otherwise use the live camera.

Take a photo, or choose from the library when the task allows it. Open screenshot at full size (opens in a new tab)Step 4
Let the AI score the photo
For an AI-enabled photo task, analysis runs automatically after submission. When available, the review includes Cleanliness and Completeness scores and written feedback. The AI does not approve or reject the member’s work. If analysis cannot complete, or the person submitting signed up with email and hasn’t verified it yet, the task still goes to manual review without a score.
Step 5
Open the submission in the Review tab
As a parent or admin, open the Review tab and select the submitted task. Review Task shows the submitted photo, any available AI Analysis feedback, and Reward Points controls. Read the member’s work and feedback together before making a decision.
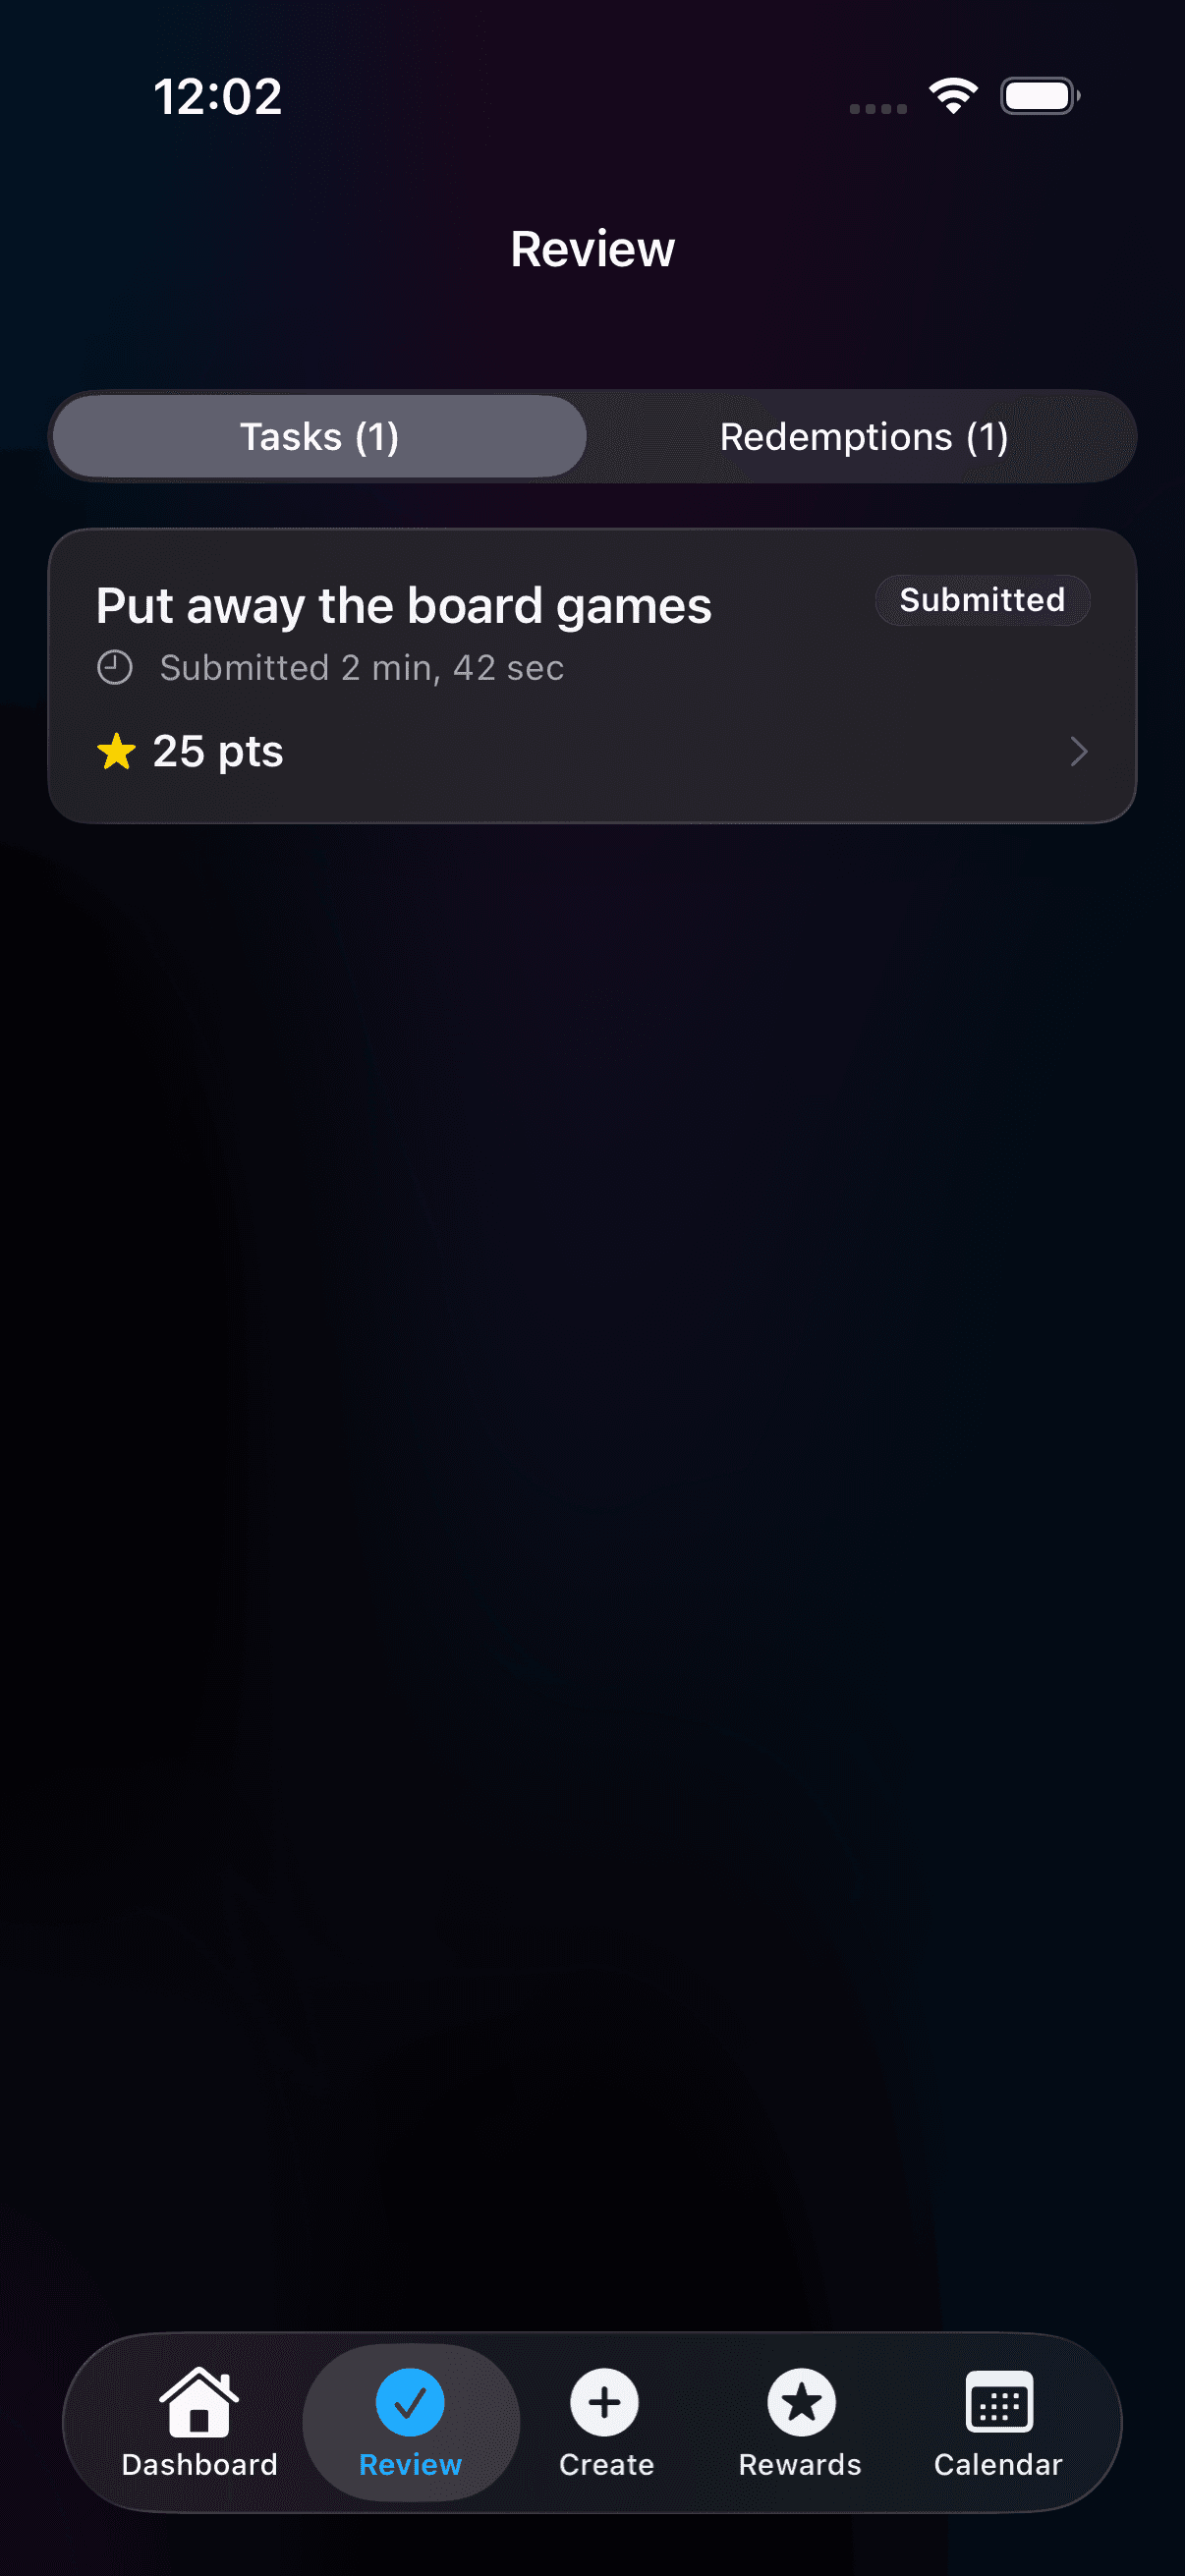
Open a submitted task from the Review tab. Open screenshot at full size (opens in a new tab)Step 6
Approve or request changes
Use Approve Task when the work meets expectations, or add feedback and choose Request Changes. Feedback is required when requesting changes. The member can then make the changes and submit again. Review any AI feedback alongside the work; the score does not make the decision for you.
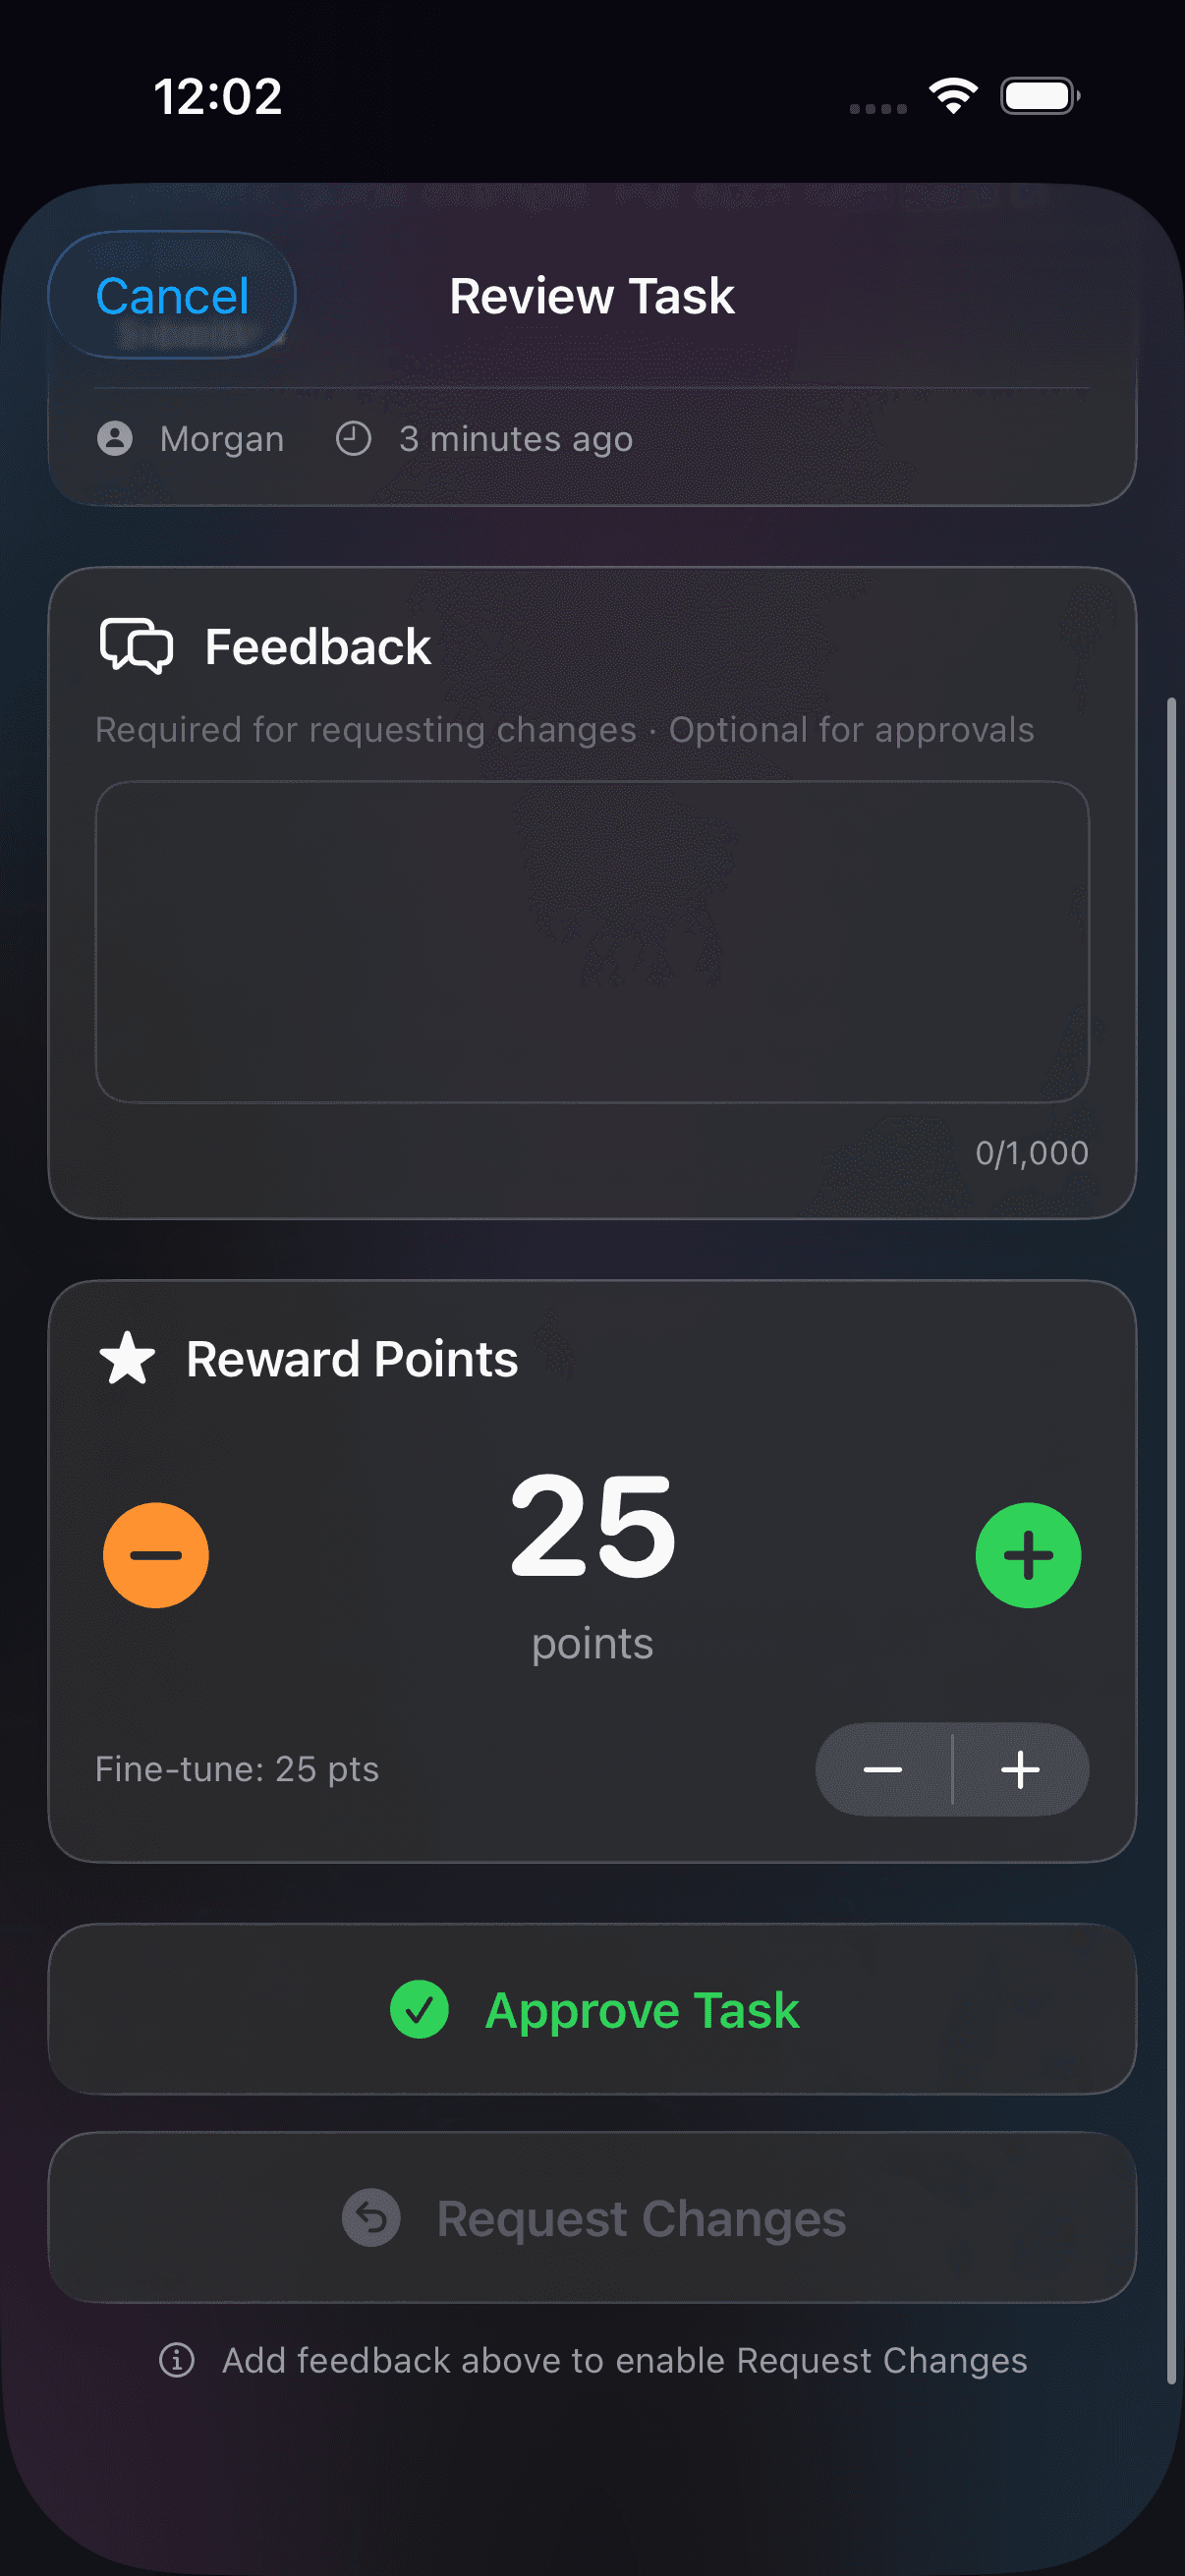
Review the points and add feedback. Feedback is required to request changes. Open screenshot at full size (opens in a new tab)
Screenshots show example household data.
One analysis per task, reserved up front
Your household’s monthly AI quota is spent when an AI-enabled task is created, not when the photo arrives. If the quota runs out, the AI toggle grays out on new tasks and submissions go straight to admin review — nothing breaks, you just review without a score. Deleting an unfinished task, or letting it go unfinished past its due date, returns its analysis to the quota. Repeating tasks are the exception: each repeat uses an analysis when it is submitted.
Ready to try it at home?
Download Talli on iPhone or iPad and start with the tasks your household repeats most.